


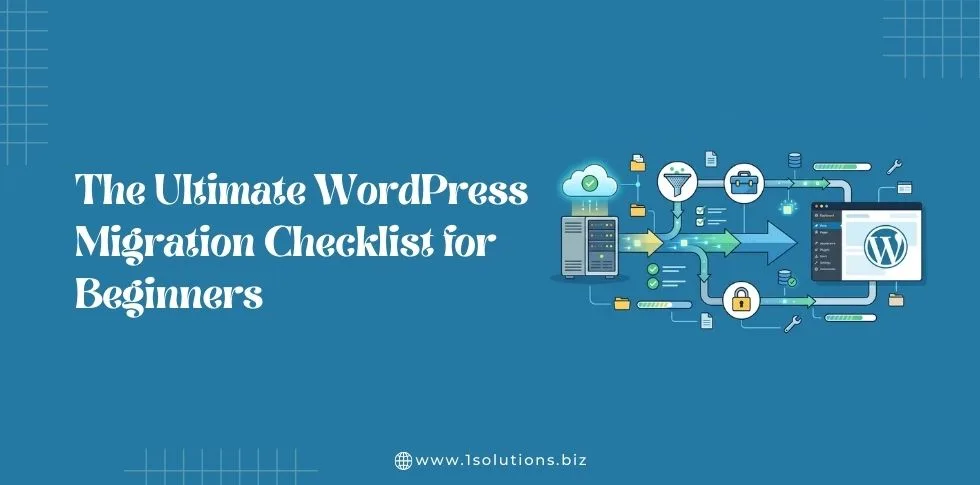
Moving a WordPress website can feel overwhelming. Whether you’re switching hosting providers, changing domain names, or moving from a staging site to live, a WordPress migration requires careful planning and execution. One mistake can lead to broken links, lost data, or SEO ranking drops.
This comprehensive checklist will guide you through every step of the WordPress migration process. You’ll learn how to prepare for migration, execute the move safely, and handle post-migration tasks that protect your site’s performance and search rankings.
Understanding WordPress Migration Types
Before diving into the checklist, you need to understand the different types of WordPress migrations. Each type has specific requirements and considerations that affect your approach.
Host to Host Migration
This involves moving your WordPress site from one web hosting provider to another. You keep the same domain name but change where your files are stored. This is the most common type of migration and often happens when businesses outgrow their current hosting plan or seek better performance.
Domain Migration
Here you change your domain name while keeping the same hosting provider. This requires careful technical SEO planning to preserve search rankings and ensure visitors can find your new domain.
Staging to Live Migration
This moves a website from a development or staging environment to the live production server. Developers often use this approach to test changes before making them public.
Local to Live Migration
This transfers a WordPress site built on a local development environment to a live web server. It’s common when developers build sites locally and then deploy them online.
Pre-Migration Planning Phase
Proper planning prevents most migration problems. This phase sets the foundation for a successful move.
Audit Your Current Website
Start by documenting your current website setup. Create a list of all plugins, themes, and custom configurations. Note any custom code modifications, especially in the functions.php file or custom post types.
Document your current hosting environment details including PHP version, MySQL version, and server specifications. Your new hosting environment should meet or exceed these requirements.
Choose the Right Time
Schedule your migration during low traffic periods. Use Google Analytics to identify when your site receives the least visitors. Avoid migrating during peak business hours, holidays, or important sales periods.
Weekend migrations work well for business sites, while weekday migrations suit sites with primarily weekend traffic.
Communicate with Stakeholders
Inform your team, clients, and key stakeholders about the planned migration. Set expectations about potential downtime and any temporary access restrictions.
If you’re working with an affordable SEO package provider, coordinate the migration timing with your SEO activities to minimize any impact on ongoing campaigns.
Essential Pre-Migration Backup Steps
Never attempt a migration without comprehensive backups. These serve as your safety net if something goes wrong.
Create Complete Website Backup
Use a reliable backup plugin to create a full site backup. Popular options include UpdraftPlus, BackWPup, or Duplicator. Ensure your backup includes:
- All WordPress files and folders
- Complete database export
- Media files and uploads
- Plugin and theme files
- Configuration files (.htaccess, wp-config.php)
Download Backup Files
Don’t rely on backups stored only on your current server. Download backup files to your local computer or cloud storage. This ensures you can access them even if your current hosting becomes unavailable.
Test Backup Integrity
Verify that your backup files are complete and functional. Extract the files and check that the database export opens correctly. A corrupted backup discovered during migration creates unnecessary stress and delays.
Document Database Information
Record your current database details including database name, username, password, and host information. You’ll need this information during the migration process.
Preparing Your New Hosting Environment
Your new hosting environment must be properly configured before transferring files. This preparation prevents compatibility issues and ensures smooth operation.
Verify Server Requirements
Confirm that your new hosting meets WordPress requirements and matches or exceeds your current environment specifications. Key factors include:
- PHP version compatibility
- MySQL or MariaDB version
- Memory limits and execution time
- Required PHP extensions
- SSL certificate availability
Set Up Database
Create a new database on your destination server. Record the database name, username, password, and host details. Many hosting providers offer easy database creation through control panels like cPanel or Plesk.
Set appropriate user permissions ensuring the database user can read, write, and modify the database structure.
Configure Domain Settings
If you’re changing domains, update DNS settings to point to your new hosting provider. If keeping the same domain, prepare to update DNS records after file transfer completion.
Consider using a temporary URL or subdomain for testing before making the final DNS switch. This allows you to verify everything works correctly before directing live traffic to the new server.
File Transfer and Database Migration
Now comes the actual migration process. Take your time with these steps to avoid errors that could break your site.
Upload WordPress Files
Transfer all WordPress files to your new hosting environment. You can use several methods:
FTP/SFTP Transfer: Use an FTP client like FileZilla to upload files directly to your new server. This method gives you complete control but can be time-consuming for large sites.
Migration Plugins: Tools like Duplicator, All-in-One WP Migration, or Migrate Guru can automate the file transfer process. These plugins create packages that include files and database exports.
Hosting Migration Tools: Many hosting providers offer migration services or tools that can transfer your site automatically. Check if your new host provides this service.
Import Database
Import your database export to the new server. Use phpMyAdmin, command line tools, or your hosting control panel’s database management interface.
Before importing, ensure the target database is empty to avoid conflicts. Large databases may require adjusting import settings or splitting the export into smaller files.
Update wp-config.php
Modify the wp-config.php file to reflect your new database connection details. Update these values:
- Database name (DB_NAME)
- Database username (DB_USER)
- Database password (DB_PASSWORD)
- Database host (DB_HOST)
If you’re changing domains, you may also need to update the WordPress site URL constants.
URL and Domain Updates
Changing URLs requires careful database modifications to ensure all internal links work correctly.
Update Site URLs in Database
If you’re changing domains or moving from a subdirectory, update the site URLs in your WordPress database. The primary locations are:
- wp_options table: siteurl and home values
- Post content with internal links
- Widget content and custom fields
- Theme customizer settings
Use WordPress CLI, phpMyAdmin, or plugins like Better Search Replace to make these updates safely.
Search and Replace Operations
Perform comprehensive search and replace operations to update all instances of your old domain or URL structure. Pay special attention to:
- Serialized data in the database
- Image URLs in post content
- Hardcoded links in theme files
- Custom field values
Always use tools designed for WordPress databases, as manual search and replace can break serialized data.
Update .htaccess File
Review and update your .htaccess file for the new environment. Remove any host-specific redirects or rules that don’t apply to your new setup. Regenerate permalink structure to ensure clean URLs work correctly.
This is particularly important for maintaining your on-page SEO optimization and ensuring search engines can properly crawl your site.
Testing Your Migrated Site
Thorough testing prevents launching a broken site. Don’t rush this phase, as identifying issues now saves time and protects your reputation.
Functional Testing
Test all major site functionality before going live:
- Homepage loads correctly
- Navigation menus work properly
- Internal links point to correct pages
- Contact forms submit successfully
- Search functionality operates correctly
- User registration and login processes
If you run an eCommerce site, test the entire checkout process including payment processing and order confirmation emails.
Plugin and Theme Verification
Verify that all plugins activate successfully and function as expected. Some plugins may require reconfiguration or license reactivation on the new server.
Check your theme customizations and ensure all design elements display correctly. Custom CSS, fonts, and layout modifications should appear identical to your original site.
Performance Testing
Test your site’s loading speed and performance on the new hosting environment. Use tools like Google PageSpeed Insights, GTmetrix, or Pingdom to benchmark performance.
Compare results to your original site’s performance metrics. If you notice significant slowdowns, investigate hosting configuration issues or resource limitations.
Mobile Responsiveness Check
Test your migrated site on various mobile devices and screen sizes. Ensure responsive design elements work correctly and mobile navigation functions properly.
Use Google’s Mobile-Friendly Test tool to verify that your site meets mobile usability standards.
DNS Changes and Going Live
Making your migrated site live requires careful DNS management to minimize downtime and prevent access issues.
Lower TTL Values
Before making DNS changes, reduce your DNS records’ Time To Live (TTL) values to 300 seconds (5 minutes). This change should be made 24-48 hours before migration to ensure the lower TTL propagates globally.
Lower TTL values allow faster DNS propagation when you make the final switch to your new hosting environment.
Update DNS Records
Change your domain’s DNS settings to point to your new hosting provider. Update these records:
- A record (points to new server IP)
- CNAME records for subdomains
- MX records if email hosting changes
- Any custom DNS entries
Make these changes during your planned maintenance window to minimize disruption.
Monitor DNS Propagation
DNS changes don’t happen instantly. Use DNS propagation checker tools to monitor when changes take effect globally. This process typically takes 24-48 hours for complete propagation.
During this period, some visitors may still see your old site while others see the new one.
Post-Migration SEO Tasks
Protecting your search engine rankings requires immediate attention to SEO elements after migration.
Update Google Search Console
If you changed domains, add your new domain to Google Search Console and verify ownership. Submit your XML sitemap to help Google discover and index your content on the new domain.
If you kept the same domain, monitor Google Search Console for any crawling errors or indexing issues that may have resulted from the migration.
Check for Indexing Issues
Monitor your site’s indexing status closely after migration. Use site: searches in Google to verify that your pages are getting indexed correctly. If you notice indexing problems, investigate technical issues that might be preventing search engine access.
Set Up 301 Redirects
If you changed domains or URL structures, implement 301 redirects from old URLs to new ones. This preserves link equity and helps visitors find your content at its new location.
Create redirects for:
- Homepage and main pages
- Popular blog posts and content
- Category and tag pages
- Any custom post types
Proper redirect implementation is crucial for maintaining your SEO strategy and preventing ranking losses.
Update Social Media Profiles
If you changed domains, update all social media profiles with your new website URL. This includes Facebook, Twitter, LinkedIn, Instagram, and any industry-specific platforms where you maintain a presence.
Monitoring and Troubleshooting
The first few weeks after migration require close monitoring to catch and resolve any issues quickly.
Monitor Site Performance
Track your site’s performance metrics closely for the first month after migration. Watch for:
- Page loading speeds
- Server response times
- Error rates and broken links
- Search engine crawling patterns
- Traffic levels and user engagement
Set up monitoring tools and alerts to notify you of any significant performance degradation.
Address Broken Links
Use tools like Google Search Console, Screaming Frog, or online broken link checkers to identify and fix any broken internal links that may have resulted from the migration process.
Pay particular attention to:
- Internal navigation links
- Image and media file URLs
- Links in post content
- Footer and header links
Fix Email Issues
If you moved email hosting along with your website, test all email functionality including:
- Sending and receiving emails
- Contact form submissions
- Automated email notifications
- Email list integrations
Email problems often surface after DNS changes, so monitor these functions closely.
Security Hardening Post-Migration
A fresh migration is an excellent opportunity to strengthen your site’s security posture.
Update All Passwords
Change all passwords associated with your WordPress site including:
- WordPress admin accounts
- FTP and hosting control panel access
- Database user passwords
- Plugin and service API keys
Use strong, unique passwords for each account and consider implementing two-factor authentication where available.
Install Security Plugins
Configure security plugins to protect your migrated site. Popular options include Wordfence, Sucuri, or iThemes Security. These tools can help protect against common threats and provide ongoing monitoring.
Review and configure security settings appropriate for your hosting environment and site requirements.
Set Up SSL Certificates
Ensure SSL certificates are properly configured on your new hosting environment. Most modern hosting providers offer free SSL certificates through Let’s Encrypt or similar services.
Update your WordPress settings to use HTTPS URLs and implement redirects from HTTP to HTTPS versions of your pages.
Advanced Migration Considerations
Complex WordPress sites may require additional attention during migration.
Multi-site Network Migrations
WordPress multisite networks require special handling during migration. You’ll need to update network settings, ensure all subsites function correctly, and verify that domain mapping works properly.
Consider migrating subsites individually if you encounter issues with the entire network migration.
Custom Application Integrations
Sites with custom integrations or API connections may require additional configuration after migration. Test all external service connections including:
- Payment processors
- Email marketing platforms
- CRM systems
- Analytics and tracking tools
- Social media integrations
Large Database Optimizations
Large WordPress databases may require optimization during migration. Consider cleaning up unnecessary data such as:
- Spam comments and old revisions
- Unused media files
- Expired transients and cache data
- Old plugin data from deactivated plugins
This cleanup can improve migration speed and site performance.
Content Delivery and Performance Optimization
Post-migration is an ideal time to implement performance optimizations that may not have been possible on your previous hosting environment.
Configure Caching
Set up appropriate caching mechanisms for your new hosting environment. This might include:
- Server-level caching (if available)
- WordPress caching plugins
- Content Delivery Network (CDN) integration
- Database query caching
Proper caching significantly improves site performance and reduces server load.
Optimize Images and Media
Migration provides an opportunity to optimize images and media files for better performance. Consider implementing:
- Image compression plugins
- WebP format conversion
- Lazy loading for images
- CDN delivery for media files
Long-term Maintenance and Monitoring
Successful migration extends beyond the initial move. Establish ongoing maintenance practices to ensure continued performance.
Regular Backup Schedule
Implement automated backup systems on your new hosting environment. Schedule regular backups of both files and database, and store copies in multiple locations.
Test backup restoration periodically to ensure your backup system works when needed.
Performance Monitoring
Set up ongoing performance monitoring to track your site’s health over time. Many hosting providers offer monitoring tools, or you can use third-party services to track uptime and performance metrics.
SEO Performance Tracking
Continue monitoring your SEO performance after migration to ensure search rankings recover and improve. Track metrics such as:
- Organic traffic levels
- Search engine rankings
- Click-through rates
- Indexing status
If you’re working with local SEO services, ensure that location-based rankings haven’t been negatively affected by the migration.
Common Migration Mistakes to Avoid
Learning from common mistakes helps ensure your migration succeeds without major issues.
Insufficient Testing
Rushing to go live without thorough testing leads to user-facing issues that could have been prevented. Always test functionality completely before making DNS changes.
Forgetting Email Configuration
Email setup is often overlooked during website migration, leading to communication disruptions. Plan email migration carefully and test all email functions before going live.
Inadequate Backup Planning
Skipping comprehensive backups or failing to verify backup integrity creates unnecessary risk. Always maintain multiple backup copies and test restoration procedures.
Ignoring SEO Implications
Failing to plan for SEO considerations during migration can result in significant ranking losses. Address redirects, indexing, and technical SEO elements proactively.
Poor Communication
Not informing stakeholders about migration plans and potential downtime creates confusion and frustration. Communicate clearly about timing, expectations, and any temporary limitations.
WordPress migration doesn’t have to be stressful when you follow a systematic approach. This checklist ensures you cover all critical aspects of the migration process, from initial planning through post-migration optimization.
Remember that complex migrations may require professional assistance. If you’re uncomfortable with any aspect of the migration process, consider working with experienced developers who specialize in WordPress migrations.
At 1Solutions, we understand the complexities of WordPress migration and offer comprehensive web development services to ensure your site migration goes smoothly. Our team can handle everything from simple host transfers to complex multi-site migrations while preserving your SEO rankings and site functionality. Get a free proposal to learn how we can help with your WordPress migration needs.
Frequently Asked Questions
How long does a WordPress migration typically take?
Migration time varies significantly based on site complexity, file sizes, and chosen method. Simple sites with basic plugins might migrate in 2-4 hours, while complex sites with large databases and custom integrations can take 24-48 hours. The actual file transfer might only take a few hours, but thorough testing and DNS propagation extend the timeline. Plan for at least a full day for most migrations, with additional time for complex sites.
Will I lose SEO rankings during migration?
Properly executed migrations should not cause permanent ranking losses. Temporary fluctuations are normal during the first few weeks as search engines recrawl your site. To minimize SEO impact, implement proper redirects, maintain the same URL structure when possible, and submit updated sitemaps to search engines. Most sites recover their rankings within 2-4 weeks after migration.
Can I migrate my WordPress site without downtime?
Zero-downtime migrations are possible but require advanced planning and techniques. You can build your new site on a temporary URL, test everything thoroughly, then quickly switch DNS settings. However, some downtime is typical during DNS propagation, even with careful planning. Most migrations involve 15-60 minutes of potential downtime during the DNS switch.
What should I do if my site breaks during migration?
First, don’t panic. If you have proper backups, you can restore your original site quickly. Common issues include incorrect database connections, missing files, or plugin conflicts. Check your wp-config.php file for correct database settings, verify all files transferred successfully, and deactivate plugins to identify conflicts. Having professional support available during migration helps resolve issues quickly.
Do I need to reinstall plugins after migration?
Generally, no. When you migrate all WordPress files and the database, your plugins should transfer with their settings intact. However, some plugins may require license reactivation or reconfiguration on the new server. API-connected plugins often need credentials re-entered. Always test plugin functionality after migration and be prepared to reconfigure settings if needed.
How do I know if my migration was successful?
A successful migration shows no broken functionality, maintains site performance, and preserves SEO elements. Check that all pages load correctly, forms submit properly, and internal links work. Monitor Google Search Console for crawling errors, verify that search engines can access your site, and confirm that traffic patterns remain normal. Performance should match or exceed your original site’s metrics.
Should I hire professionals for WordPress migration?
Consider professional help for complex sites, mission-critical websites, or if you’re uncomfortable with technical aspects. Professional migration services are especially valuable for eCommerce sites, multisite networks, or sites with custom development. The cost of professional migration is often less than the potential revenue loss from a failed DIY migration. Evaluate your technical skills, site complexity, and risk tolerance when deciding.


 in India